
Categorize your queue managers
You can place all your queue managers in different categories. It does not have any impact on any functions of any objects of queue manager, but it definitely helps to organize all the queue managers of your organization in different logical groups. So you may want to expand only that category to view only those queue managers in which you are currently interested. You don’t have to search your queue manager thru a long list of all the queue managers any more. Even within one category, all the queue managers are arranged in alphabetical order.
You can optionally provide different colors to your queue managers. This helps in visually indicating you the type of queue manager.For example, you may assign red color to all production queue managers and green to development queue managers.
You can create as many children of a parent category as you want and you can create as many siblings of a category as you want. If a child category is not defined with any color, it will have color of its parent. Because queue managers cannot be assigned colors individually, they will inherit color from their parent category.
Following description is related to creating categories when you do not use shared file. Refer to 'Setting Authorities' section for how to set categories in a shared file.
Create a new category
|
1 |
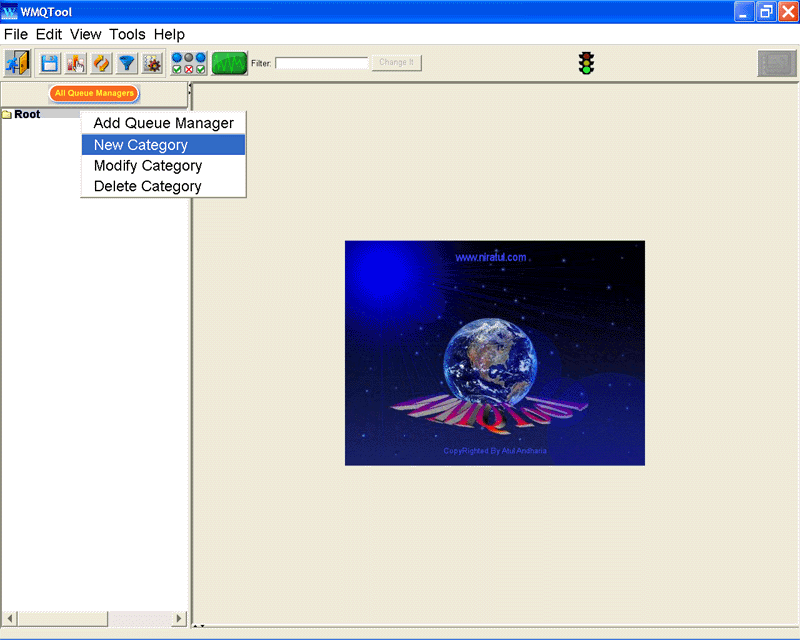
Select the parent category to create a new category. When you just start using WMQTool for the first time, there will be only one category, Root. |
|
2 |
Right click on the parent category. |
|
3 |
Select New Category from the menu. |
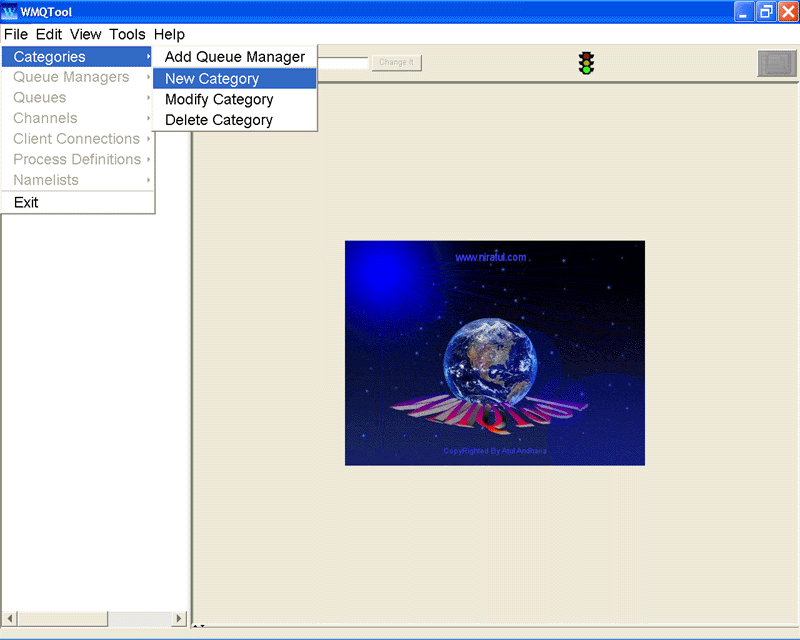
Alternatively, you can select it from the Menu by clicking on File/Categories/New Category.
A window will be displayed to ask for the name of the new category and a command button to assign color to it..
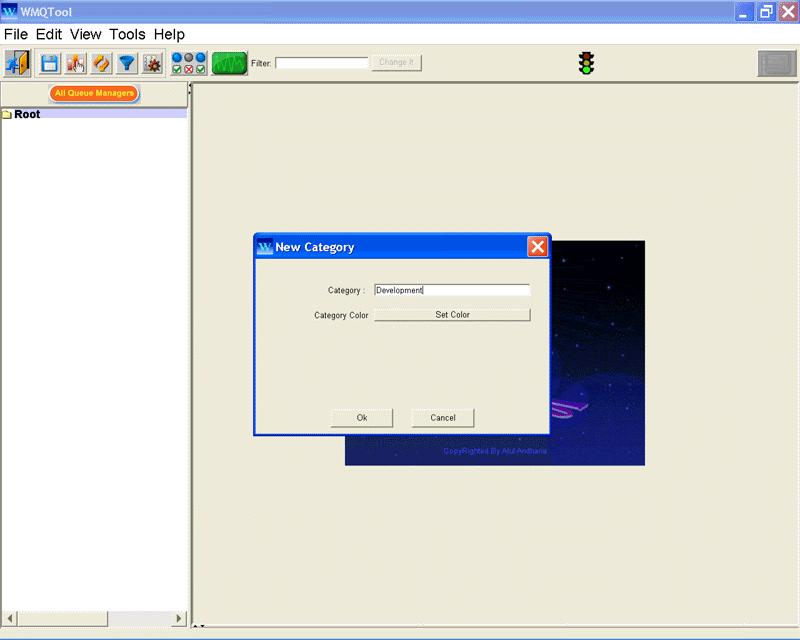
Enter new category name to be created.
Click on 'Set Color' button. Pick the color you want. You can also provide Red, Green and Blue values of the color you want.
Click on 'Ok' when done. The new category will be added as a child of the selected parent.
Modify existing category
|
1 |
Select the category you want to modify. |
|
2 |
Right click on it. |
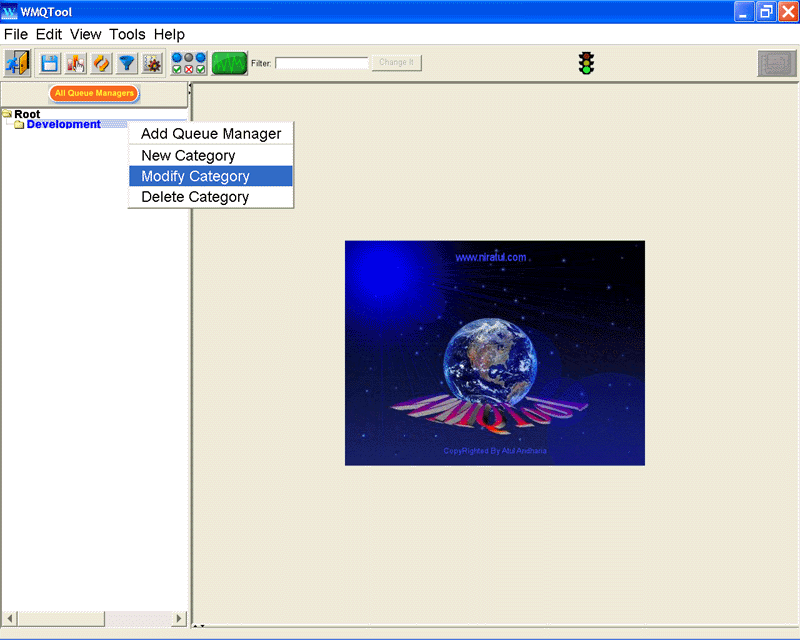
Select ‘Modify Category’ from the menu. A new window will be displayed with selected category. Correct the category name or its color by clicking on 'Set Color' button.
Click ‘Ok’ to save your changes or ‘Cancel’ to cancel the changes.
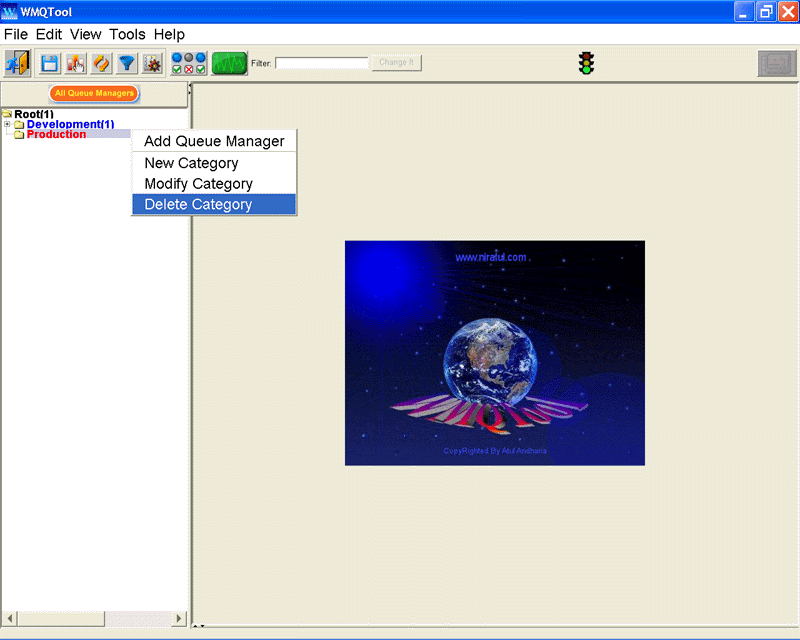
Delete existing category
Select the category you want to remove.
Right click on it.
Select ‘Delete Category’ from the menu.
A dialog box will be displayed asking you to confirm the deleting selected category.
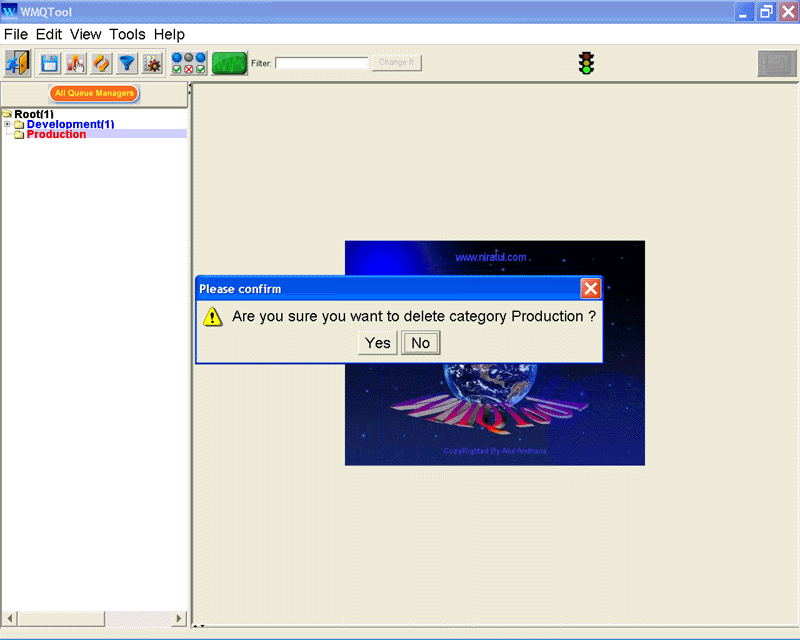
Select ‘Yes’ to confirm, ‘No’ to abort the action.
Note:
If you see the options deactivated in the popup menu, it means that you are using a shared file for categories and queue manager connection informations. In that case, you will have to do it by selecting menu option Tools/Set Authorities/Shared file and then clicking on 'Set Queue Manager Tree' button. Please refer to this for more information on how to set a shared file.
Sometimes you may want to change the parent of a child and his all children. The child can be a queue manager entry or another category which may have children. You can do this very easily by drag and drop of the child node.
All the children, if any, of the selected node will be transferred to new parent.
Select the category or the queue manager entry you want to change the parent of, by clicking mouse.
Drag it to the desired parent and drop it onto it.